Getting Started with Python: Complete Installation and Setup Guide 2026
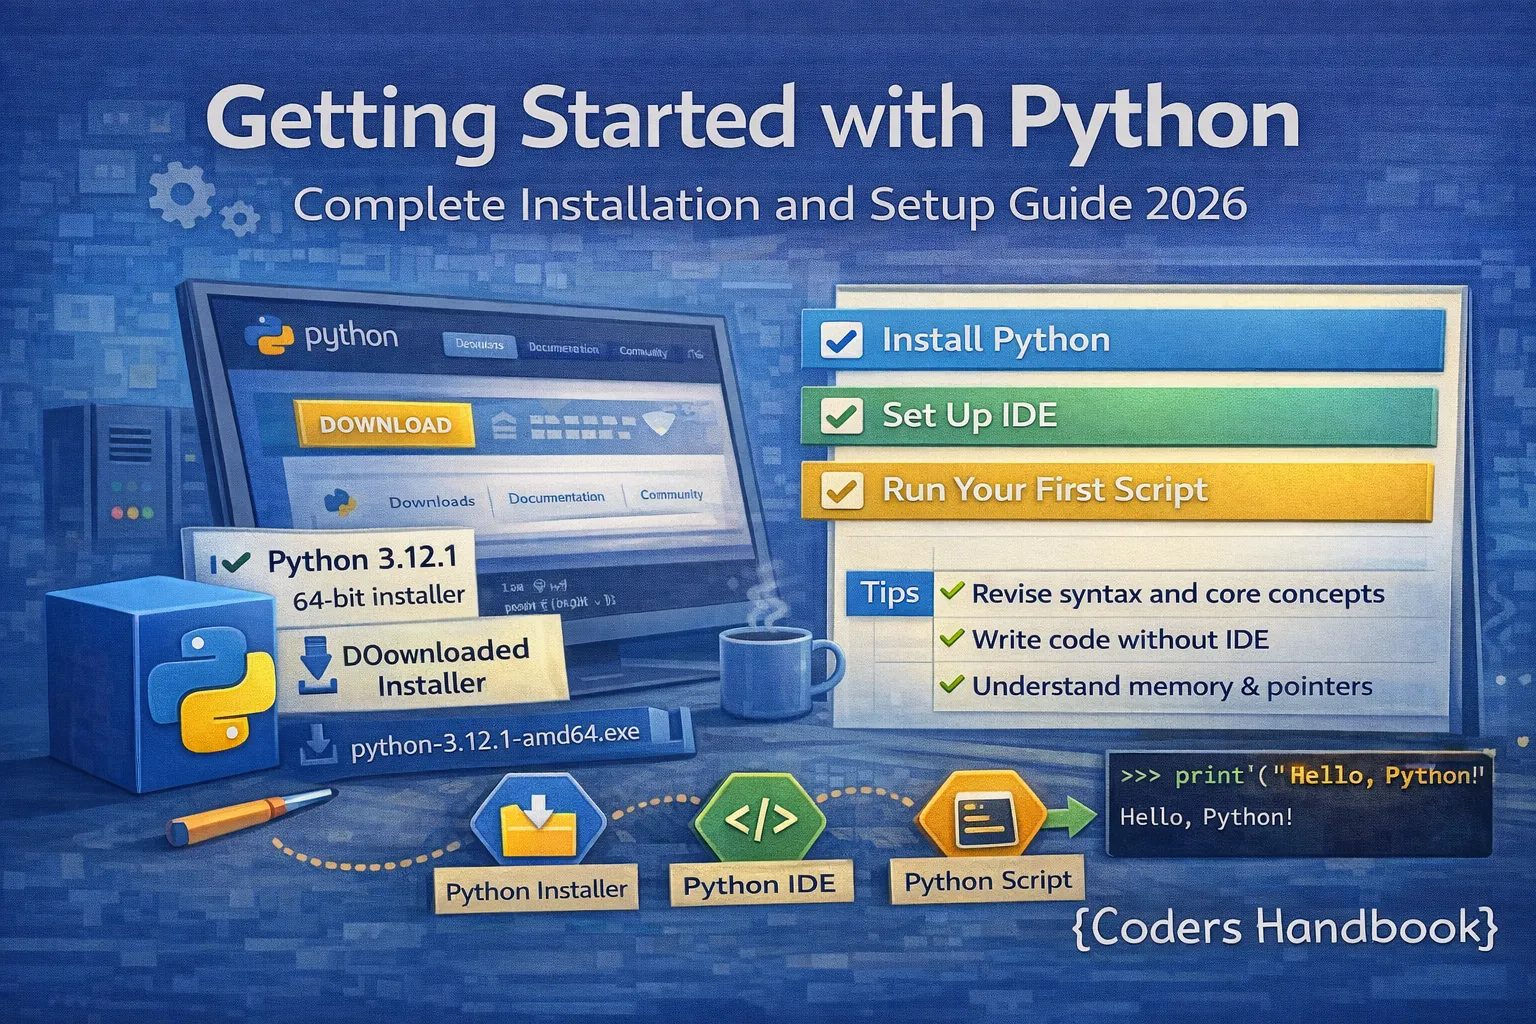
Python has become one of the most popular programming languages in 2026, used for web development, data science, artificial intelligence, automation, and more. This comprehensive guide walks you through installing Python on Windows, macOS, and Linux, setting up professional development environments with VS Code, PyCharm, or Jupyter Notebook, and writing your first program. Whether you're a complete beginner or setting up a new machine, this tutorial will get you coding in minutes with best practices for virtual environments, package management, and essential tools [web:363][web:367].
Why Python in 2026
Python's clear syntax makes it ideal for beginners while remaining powerful enough for professional applications across industries. The language continues to evolve with Python 3.14+ offering improved performance, better error messages, and enhanced standard library features. Python's extensive ecosystem of libraries and frameworks, strong community support, and cross-platform compatibility make it the top choice for developers at every skill level.
Installing Python on Windows
Windows users have two installation methods: downloading from the official Python website or using the Microsoft Store. The official installer provides more control and is recommended for development work, while the Microsoft Store installation offers automatic updates and simplified management.
Method 1: Official Python Installer
- Download the installer: Visit python.org and download the latest Python 3.x installer for Windows, which automatically detects whether you need the 32-bit or 64-bit version
- Run the installer: Double-click the downloaded .exe file and crucially check the box that says "Add Python to PATH" before clicking Install Now
- Verify installation: Open Command Prompt and type
python --versionto confirm Python installed correctly and displays the version number
# Open Command Prompt (Win + R, type cmd, press Enter)
# Verify Python installation
python --version
# Output: Python 3.14.0 (or your installed version)

# Verify pip (Python package manager) installation
pip --version
# Output: pip 24.0 from C:\Users\...\Python314\lib\site-packages\pip (python 3.14)

# Check Python installation path
where python
# Output: C:\Users\YourName\AppData\Local\Programs\Python\Python314\python.exe
Method 2: Microsoft Store
- Open Microsoft Store: Search for Microsoft Store in the Start menu and launch it
- Search for Python: Use the search bar to find "Python 3.14" or the latest version [web:367]
- Install: Click the Install button and the Store will automatically handle PATH configuration and updates
Installing Python on macOS
macOS comes with Python 2.7 pre-installed, but you need Python 3.x for modern development. The recommended approach uses Homebrew, the popular macOS package manager that simplifies installation and updates.
Step 1: Install Homebrew
Homebrew is a package manager that makes installing development tools on macOS simple and organized. Open Terminal (press Cmd+Space, type Terminal, press Enter) and install Homebrew with the official installation command.
# Install Homebrew (package manager for macOS)
/bin/bash -c "$(curl -fsSL https://raw.githubusercontent.com/Homebrew/install/HEAD/install.sh)"

# Follow the prompts and enter your password when requested
# After installation, run the "Next steps" commands shown
# These add Homebrew to your PATH environment variable

# Example Next steps commands (exact path may vary):
echo 'eval "$(/opt/homebrew/bin/brew shellenv)"' >> ~/.zprofile
eval "$(/opt/homebrew/bin/brew shellenv)"

# Verify Homebrew installation
brew --version
# Output: Homebrew 4.2.0 (or current version)
Step 2: Install Python
# Install Python 3 using Homebrew
brew install python3

# Homebrew will download and install Python along with pip
# This typically takes 2-5 minutes depending on your connection

# Verify installation
python3 --version
# Output: Python 3.14.0

pip3 --version
# Output: pip 24.0 from /opt/homebrew/lib/python3.14/site-packages/pip (python 3.14)

# Check installation location
which python3
# Output: /opt/homebrew/bin/python3python3 and pip3 commands on macOS to ensure you're using Python 3.x instead of the pre-installed Python 2.7 [web:364]. You can create an alias in your shell configuration if you prefer typing just python.Installing Python on Linux
Most Linux distributions come with Python 3 pre-installed, but you may need to update to the latest version or install development tools. The installation process differs slightly between Debian/Ubuntu-based and Fedora/RHEL-based distributions.
Check Existing Python Installation
# Check if Python 3 is already installed
python3 --version
# Output: Python 3.12.0 (or similar)

# If Python is not found or outdated, proceed with installation below
Ubuntu/Debian Installation
# Update package list
sudo apt update

# Install Python 3 and pip
sudo apt install python3 python3-pip python3-venv -y

# Install additional development tools (recommended)
sudo apt install python3-dev build-essential -y

# Verify installation
python3 --version
pip3 --version

# Check installation path
which python3
# Output: /usr/bin/python3
Fedora/RHEL/CentOS Installation
# For Fedora (using dnf)
sudo dnf install python3 python3-pip -y

# For RHEL/CentOS 8+ (using dnf)
sudo dnf install python3 python3-pip -y

# For older CentOS 7 (using yum)
sudo yum install python3 python3-pip -y

# Verify installation
python3 --version
pip3 --version
Setting Up VS Code for Python
Visual Studio Code is a free, lightweight, and powerful code editor that has become the most popular choice for Python development in 2026. With the Python extension, VS Code provides IntelliSense code completion, debugging, linting, and integrated terminal support.
Install VS Code and Python Extension
- Download VS Code: Visit code.visualstudio.com and download the installer for your operating system (Windows, macOS, or Linux)
- Install VS Code: Run the installer and follow the prompts, accepting default settings
- Open Extensions panel: Launch VS Code and press Ctrl+Shift+X (Windows/Linux) or Cmd+Shift+X (macOS) to open the Extensions marketplace
- Install Python extension: Search for "Python" and install the official extension by Microsoft, which includes IntelliSense, linting, debugging, and Jupyter support
- Select Python interpreter: Press Ctrl+Shift+P (Cmd+Shift+P on macOS), type "Python: Select Interpreter", and choose your installed Python version
# Create your first Python file in VS Code
# 1. Open VS Code
# 2. Press Ctrl+N (Cmd+N on macOS) to create a new file
# 3. Save it as hello.py (Ctrl+S or Cmd+S)
# 4. Type the following code:

print("Hello, World!")
print("Welcome to Python programming!")

# 5. Run the code:
#    - Press Ctrl+F5 (Run Without Debugging)
#    - Or right-click in the editor and select "Run Python File in Terminal"
#    - Or click the play button in the top-right corner

# Output:
# Hello, World!
# Welcome to Python programming!Setting Up PyCharm for Python
PyCharm is a full-featured integrated development environment (IDE) specifically designed for Python development. While more resource-intensive than VS Code, PyCharm offers advanced debugging, integrated testing, database tools, and professional code analysis out of the box. The Community Edition is free and sufficient for most projects.
Install and Configure PyCharm
- Download PyCharm: Visit jetbrains.com/pycharm and download PyCharm Community Edition (free) or Professional Edition (30-day trial)
- Install PyCharm: Run the installer for your operating system and follow the setup wizard
- Create a new project: Launch PyCharm, click "New Project", choose a location, and PyCharm will automatically detect your Python installation
- Configure interpreter: PyCharm sets up a virtual environment by default for each project, isolating dependencies
- Create Python file: Right-click the project folder, select New > Python File, name it (e.g., main.py), and start coding
# First program in PyCharm
# Create a new Python file (right-click project > New > Python File)
# Name it: main.py

def greet(name):
    """Greet the user with their name."""
    return f"Hello, {name}! Welcome to Python with PyCharm."

if __name__ == "__main__":
    # Run this file by right-clicking and selecting "Run 'main'"
    # Or press Shift+F10 (Windows/Linux) or Ctrl+R (macOS)

    user_name = input("Enter your name: ")
    message = greet(user_name)
    print(message)

    print("\nPyCharm features:")
    print("- Advanced debugging with breakpoints")
    print("- Intelligent code completion")
    print("- Built-in testing support")
    print("- Integrated version control")

# Output:
# Enter your name: Alice
# Hello, Alice! Welcome to Python with PyCharm.
#
# PyCharm features:
# - Advanced debugging with breakpoints
# - Intelligent code completion
# - Built-in testing support
# - Integrated version control
Setting Up Jupyter Notebook
Jupyter Notebook is an interactive web-based environment perfect for data analysis, machine learning, and educational purposes. It allows you to write and execute code in cells, see results immediately, and combine code with markdown text, equations, and visualizations in a single document.
Install Jupyter Using pip
# Install Jupyter Notebook using pip (recommended method)
pip install notebook

# For Linux/macOS:
pip3 install notebook

# Alternative: Install JupyterLab (next-generation interface)
pip install jupyterlab

# Verify installation
jupyter --version
# Output: jupyter core version, notebook version, etc.

# Launch Jupyter Notebook
jupyter notebook

# This will:
# 1. Start the Jupyter server
# 2. Automatically open http://localhost:8888 in your default browser
# 3. Show the file browser where you can create new notebooks

# To stop the server: Press Ctrl+C in the terminal twice
Create Your First Jupyter Notebook
- Launch Jupyter: Run
jupyter notebookin your terminal, which opens the web interface in your browser - Create new notebook: Click "New" > "Python 3" to create a new notebook file (.ipynb)
- Write code in cells: Type Python code in a cell and press Shift+Enter to execute it and see results immediately below
- Add markdown cells: Change cell type to Markdown for documentation, explanations, and formatted text
- Save and share: Notebooks save automatically and can be exported to HTML, PDF, or shared as .ipynb files
# First Jupyter Notebook cells
# Cell 1 (Code cell): Import and greeting
import datetime

print("Hello from Jupyter Notebook!")
print(f"Current date and time: {datetime.datetime.now()}")

# Cell 2 (Code cell): Simple calculation
print("\n=== Python Calculator ===")
numbers = [1, 2, 3, 4, 5]
sum_result = sum(numbers)
average = sum_result / len(numbers)

print(f"Numbers: {numbers}")
print(f"Sum: {sum_result}")
print(f"Average: {average}")

# Cell 3 (Code cell): Data visualization example
import matplotlib.pyplot as plt

# Simple plot
x = [1, 2, 3, 4, 5]
y = [2, 4, 6, 8, 10]

plt.figure(figsize=(8, 4))
plt.plot(x, y, marker='o', color='blue', linewidth=2)
plt.title('My First Jupyter Plot')
plt.xlabel('X axis')
plt.ylabel('Y axis')
plt.grid(True)
plt.show()

# Note: To run each cell, click on it and press Shift+Enter
# The plot will appear directly below the cell
Virtual Environments and Package Management
Virtual environments are isolated Python installations that allow you to manage project-specific dependencies without affecting your system Python or other projects. Using virtual environments is a best practice that prevents version conflicts and makes projects reproducible and shareable.
Creating and Using Virtual Environments
# Navigate to your project directory
cd my_python_project

# ===== WINDOWS =====
# Create virtual environment named 'venv'
python -m venv venv

# Activate the virtual environment
venv\Scripts\activate

# Your prompt will change to show (venv) indicating it's active


# ===== macOS / LINUX =====
# Create virtual environment
python3 -m venv venv

# Activate the virtual environment
source venv/bin/activate

# Your prompt will change to (venv) username@computer


# ===== VERIFY VIRTUAL ENVIRONMENT (All platforms) =====
# Check which Python you're using (should show path inside venv folder)
which python  # macOS/Linux
where python  # Windows

# Check Python version
python --version

# Check pip version (should also be in venv)
pip --version
Installing Packages with pip
# Make sure virtual environment is activated (you see (venv) in prompt)

# Install a single package
pip install requests

# Install specific version
pip install numpy==1.24.0

# Install multiple packages
pip install pandas matplotlib seaborn

# Upgrade pip itself
pip install --upgrade pip

# Upgrade a package
pip install --upgrade requests

# List installed packages
pip list

# Show details about a package
pip show requests

# Save installed packages to requirements.txt
pip freeze > requirements.txt

# Install packages from requirements.txt (for sharing projects)
pip install -r requirements.txt

# Uninstall a package
pip uninstall requests

# Deactivate virtual environment when done
deactivatevenv/ to your .gitignore file. Use requirements.txt to document dependencies so others can recreate your environment exactly.Your First Python Programs
Now that Python is installed and your development environment is configured, let's write some practical programs to explore Python's syntax and capabilities. These examples demonstrate fundamental concepts including variables, user input, functions, and basic data structures.
Hello World and Basic Output
# ===== HELLO WORLD =====
# The classic first program in any language
print("Hello, World!")

# Output:
# Hello, World!


# ===== VARIABLES AND DATA TYPES =====
name = "Alice"              # String
age = 25                    # Integer
height = 5.6               # Float
is_student = True          # Boolean

print(f"Name: {name}")
print(f"Age: {age}")
print(f"Height: {height} feet")
print(f"Is student: {is_student}")

# Output:
# Name: Alice
# Age: 25
# Height: 5.6 feet
# Is student: True


# ===== USER INPUT =====
user_name = input("What is your name? ")
user_age = input("How old are you? ")

print(f"\nHello, {user_name}!")
print(f"You are {user_age} years old.")

# Interactive output:
# What is your name? Bob
# How old are you? 30
#
# Hello, Bob!
# You are 30 years old.


# ===== BASIC ARITHMETIC =====
a = 10
b = 3

print(f"\nArithmetic Operations:")
print(f"{a} + {b} = {a + b}")      # Addition
print(f"{a} - {b} = {a - b}")      # Subtraction
print(f"{a} * {b} = {a * b}")      # Multiplication
print(f"{a} / {b} = {a / b:.2f}")  # Division
print(f"{a} // {b} = {a // b}")    # Floor division
print(f"{a} % {b} = {a % b}")      # Modulus
print(f"{a} ** {b} = {a ** b}")    # Exponentiation

# Output:
# Arithmetic Operations:
# 10 + 3 = 13
# 10 - 3 = 7
# 10 * 3 = 30
# 10 / 3 = 3.33
# 10 // 3 = 3
# 10 % 3 = 1
# 10 ** 3 = 1000
Simple Calculator Program
# ===== SIMPLE CALCULATOR =====
# Demonstrates functions, conditionals, and loops

def add(x, y):
    """Add two numbers."""
    return x + y

def subtract(x, y):
    """Subtract y from x."""
    return x - y

def multiply(x, y):
    """Multiply two numbers."""
    return x * y

def divide(x, y):
    """Divide x by y."""
    if y == 0:
        return "Error: Division by zero!"
    return x / y

def calculator():
    """Main calculator function."""
    print("===== Simple Calculator =====")
    print("Operations:")
    print("1. Add")
    print("2. Subtract")
    print("3. Multiply")
    print("4. Divide")
    print("5. Exit")

    while True:
        choice = input("\nEnter choice (1-5): ")

        if choice == '5':
            print("Thank you for using the calculator!")
            break

        if choice in ['1', '2', '3', '4']:
            try:
                num1 = float(input("Enter first number: "))
                num2 = float(input("Enter second number: "))

                if choice == '1':
                    print(f"Result: {num1} + {num2} = {add(num1, num2)}")
                elif choice == '2':
                    print(f"Result: {num1} - {num2} = {subtract(num1, num2)}")
                elif choice == '3':
                    print(f"Result: {num1} × {num2} = {multiply(num1, num2)}")
                elif choice == '4':
                    result = divide(num1, num2)
                    print(f"Result: {num1} ÷ {num2} = {result}")

            except ValueError:
                print("Invalid input! Please enter numbers only.")
        else:
            print("Invalid choice! Please select 1-5.")

# Run the calculator
if __name__ == "__main__":
    calculator()

# Example interaction:
# ===== Simple Calculator =====
# Operations:
# 1. Add
# 2. Subtract
# 3. Multiply
# 4. Divide
# 5. Exit
#
# Enter choice (1-5): 1
# Enter first number: 15
# Enter second number: 7
# Result: 15.0 + 7.0 = 22.0
#
# Enter choice (1-5): 5
# Thank you for using the calculator!
Working with Lists and Loops
# ===== LISTS AND LOOPS =====
# Demonstrates Python's powerful list operations

# Create a list
fruits = ["apple", "banana", "cherry", "date", "elderberry"]

print("===== List Operations =====")
print(f"Original list: {fruits}")
print(f"First fruit: {fruits[0]}")
print(f"Last fruit: {fruits[-1]}")
print(f"Number of fruits: {len(fruits)}")

# Add items
fruits.append("fig")
print(f"\nAfter append: {fruits}")

fruits.insert(2, "coconut")
print(f"After insert at index 2: {fruits}")

# Remove items
fruits.remove("banana")
print(f"After removing banana: {fruits}")

# Loop through list
print("\nAll fruits:")
for i, fruit in enumerate(fruits, 1):
    print(f"{i}. {fruit.capitalize()}")

# List comprehension (advanced but common)
squares = [x**2 for x in range(1, 6)]
print(f"\nSquares of 1-5: {squares}")

# Filtering
long_fruits = [fruit for fruit in fruits if len(fruit) > 5]
print(f"Fruits with more than 5 letters: {long_fruits}")

# Output:
# ===== List Operations =====
# Original list: ['apple', 'banana', 'cherry', 'date', 'elderberry']
# First fruit: apple
# Last fruit: elderberry
# Number of fruits: 5
#
# After append: ['apple', 'banana', 'cherry', 'date', 'elderberry', 'fig']
# After insert at index 2: ['apple', 'banana', 'coconut', 'cherry', 'date', 'elderberry', 'fig']
# After removing banana: ['apple', 'coconut', 'cherry', 'date', 'elderberry', 'fig']
#
# All fruits:
# 1. Apple
# 2. Coconut
# 3. Cherry
# 4. Date
# 5. Elderberry
# 6. Fig
#
# Squares of 1-5: [1, 4, 9, 16, 25]
# Fruits with more than 5 letters: ['coconut', 'elderberry']
Common Issues and Troubleshooting
New Python users frequently encounter installation and setup issues that can be quickly resolved with the right knowledge. Understanding common problems and their solutions helps you start coding faster and debug issues independently.
- "python is not recognized" on Windows: Python wasn't added to PATH during installation. Uninstall and reinstall, checking "Add Python to PATH", or manually add Python to PATH in System Environment Variables
- Multiple Python versions conflict: Use
python3andpip3explicitly on macOS/Linux, or use virtual environments to isolate projects - Permission denied errors on Linux/macOS: Use
pip install --user packagenameto install in user directory, or use virtual environments (recommended) - VS Code doesn't detect Python: Press Ctrl+Shift+P, type "Python: Select Interpreter", and manually choose your Python installation
- Package installation fails: Upgrade pip first with
pip install --upgrade pip, then try installing the package again - "ModuleNotFoundError": Package isn't installed in the active environment; activate your virtual environment and install the package with pip
- Jupyter won't start: Check if another instance is running, ensure you have the correct port available, or try
jupyter notebook --port 8889to use a different port
Next Steps in Your Python Journey
With Python installed and your development environment configured, you're ready to dive deeper into programming fundamentals and explore Python's rich ecosystem. Focus on building a strong foundation with core concepts before moving to specialized libraries and frameworks.
- Learn Python fundamentals: Study variables, data types, control flow (if/else, loops), functions, and classes through interactive tutorials and practice problems
- Practice with coding challenges: Use platforms like LeetCode, HackerRank, or Codewars to solve problems and reinforce concepts
- Build small projects: Create practical programs like to-do lists, number guessing games, or web scrapers to apply your knowledge
- Explore popular libraries: Learn pandas for data analysis, matplotlib for visualization, requests for web APIs, or Django/Flask for web development
- Study version control: Learn Git and GitHub to manage your code, collaborate with others, and showcase your projects
- Read quality code: Explore open-source Python projects on GitHub to see how experienced developers structure and document their code
- Join the community: Participate in Python forums, Stack Overflow, Reddit's r/learnpython, and local Python user groups
Conclusion
Installing Python and setting up a professional development environment is the essential first step toward becoming proficient in one of the world's most popular and versatile programming languages. This comprehensive guide walked you through installing Python 3.14+ on Windows using the official installer or Microsoft Store with critical PATH configuration, macOS using Homebrew package manager, and Linux using apt or dnf package managers with proper verification steps. You learned to configure three powerful development environments: Visual Studio Code with the Python extension for lightweight editing and debugging, PyCharm for a full-featured IDE experience with advanced tools, and Jupyter Notebook for interactive data science and learning. The guide covered essential skills including creating and activating virtual environments with venv for project isolation, managing packages with pip including requirements.txt for reproducibility, and writing your first Python programs from simple "Hello World" to practical calculators and list operations demonstrating functions, loops, and data structures.
Understanding virtual environments prevents dependency conflicts between projects and ensures your code runs consistently across different machines, while pip enables access to over 400,000 packages in the Python Package Index for any imaginable task from web development to machine learning. Common troubleshooting solutions address issues like PATH configuration on Windows, permission errors on Unix systems, interpreter selection in VS Code, and module import problems. Your Python journey continues with mastering fundamentals through practice, building projects, exploring specialized libraries like pandas and Django, learning version control with Git, and engaging with the supportive Python community through forums and open-source contributions. With Python installed, your environment configured, and foundational programs written, you now have the tools and knowledge to explore Python's vast capabilities in web development, data science, automation, artificial intelligence, and countless other domains where Python has become the language of choice in 2026.
$ share --platform
$ cat /comments/ (0)
$ cat /comments/
// No comments found. Be the first!