Automatic application deployment in AWS
Automatic application deployment in AWS, Hmm… Sounds familiar? if not then don’t worry it’s a part of DevOps Operations and we will see how to do exactly that.
If you are managing servers and hosting in house developed applications then you have faced the situation when you have to pull the changes in production more often and doing this manually is a tedious task and prone to errors that should not be allowed when working with a production environment.
Here comes the CI/CD (Continuous integration (CI) and continuous delivery (CD)) to the rescue. Here we will see how this can be done easily with the help of AWS CodePipeline and archive automatic application deployment in AWS.
You can visit the official page here to check out it’s features and pricing. Now, if you are ready to use this service in your environment then let’s get started.
Here, I will be using AWS Code Commit as my code repository as it’s easy to trigger our pipeline from there, but you can use other code repositories that are supported by AWS but you have to set up the callback to trigger your pipeline.
Our setup will look something like this:
CodeCommit → CodeBuild → CodeDeploy
This is the simplest form we can setup, For more advance real word situation would include setup like this:
CodeCommit → CodeBuild → Test → CodeDeploy (Staging) → Approval → CodeDeploy (Production)
In this post, we are not going to cover all the tools in depth but only see the configurations which are needed to set up CodePipeline.
Setup the Repository in CodeCommit
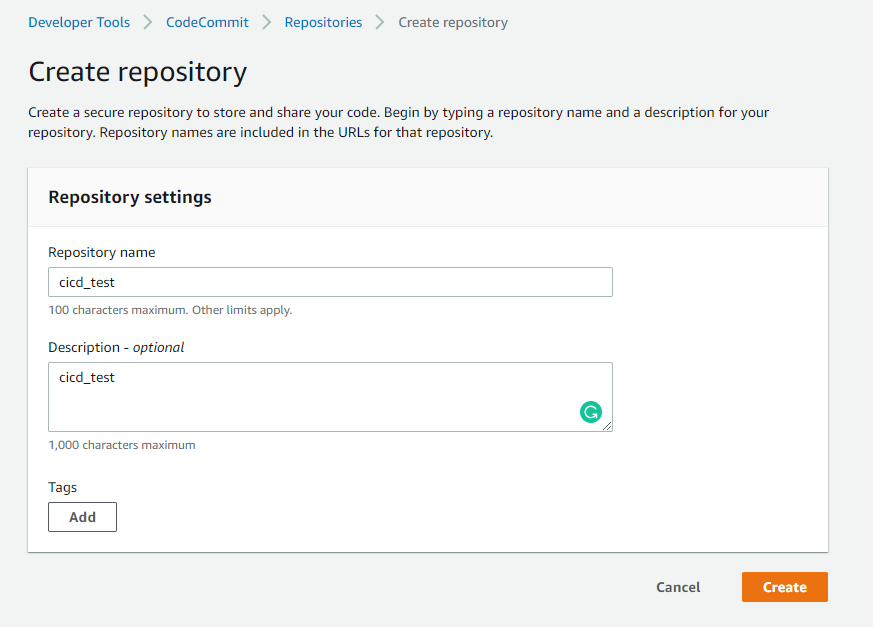
AWS Provides a nice wizard to set up your pipeline. Let’s go through it’s steps one by one.
Go to the Services → CodePipeline → Create Pipeline
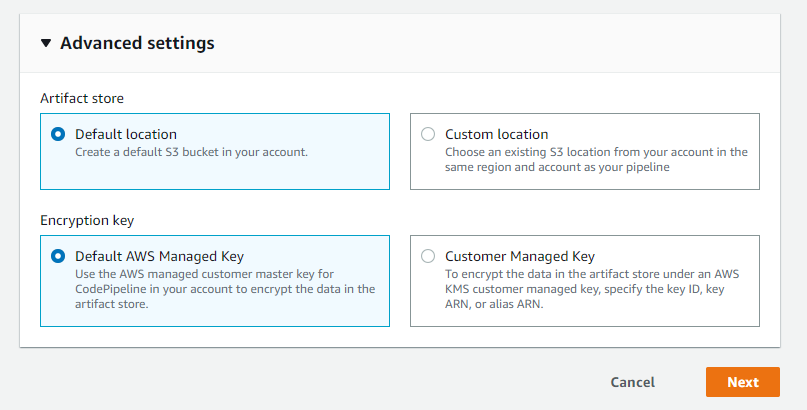
If you expand the advanced settings, then you will see above options, initially we don’t need to change anything here.
Click on “Next”
Source Stage (CodeCommit)
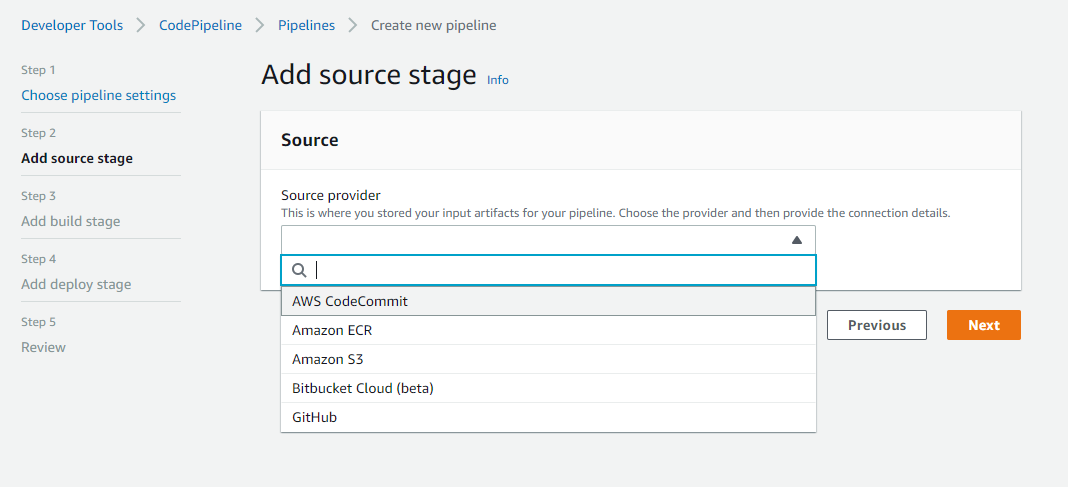
Here, We have to select the service provider for your code repository, as i explained before we will select AWS CodeCommit here.
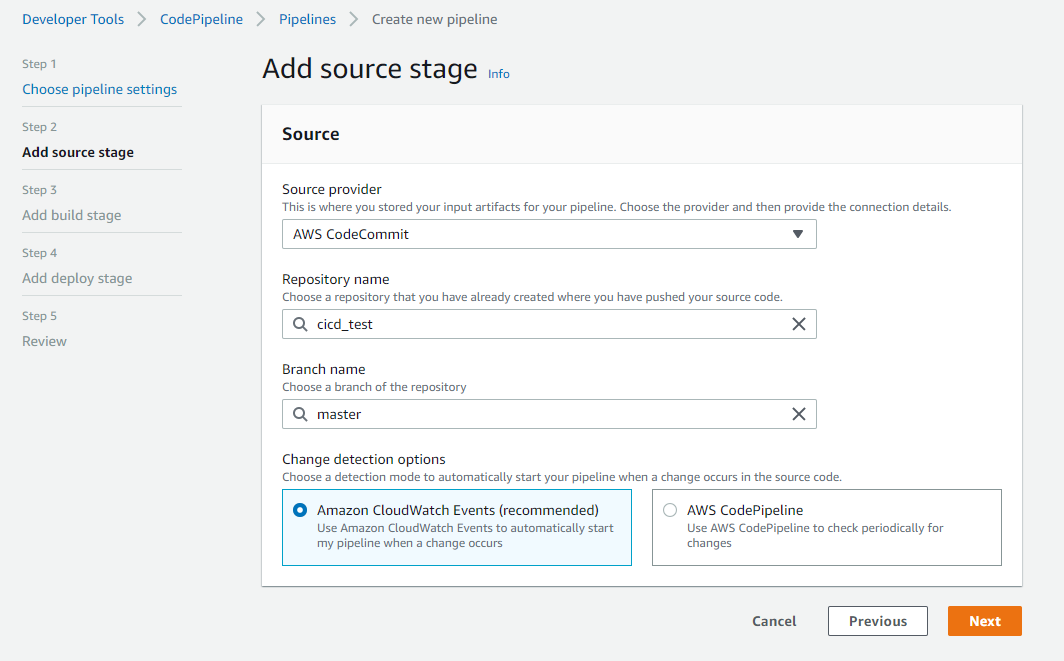
Here, For change detection option, we will select “Amazon CloudWatch Events” as it’s recommended by AWS. We can select the second option but it can have a delay before it picks up changes.
Build Stage (CodeBuild)
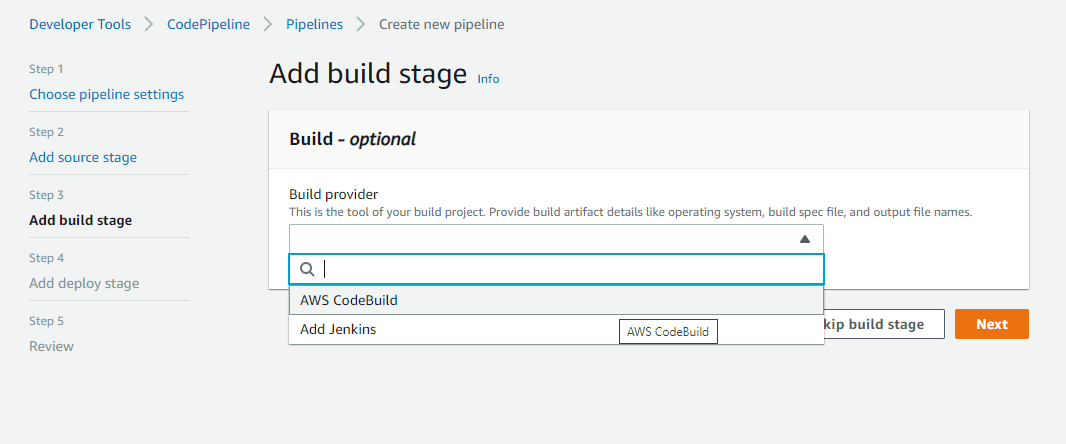
Next, We have to select how we want to build our application, for this we will use “AWS CodeBuild”. If you are familiar with Jenkins and want to use that then you can select that option.
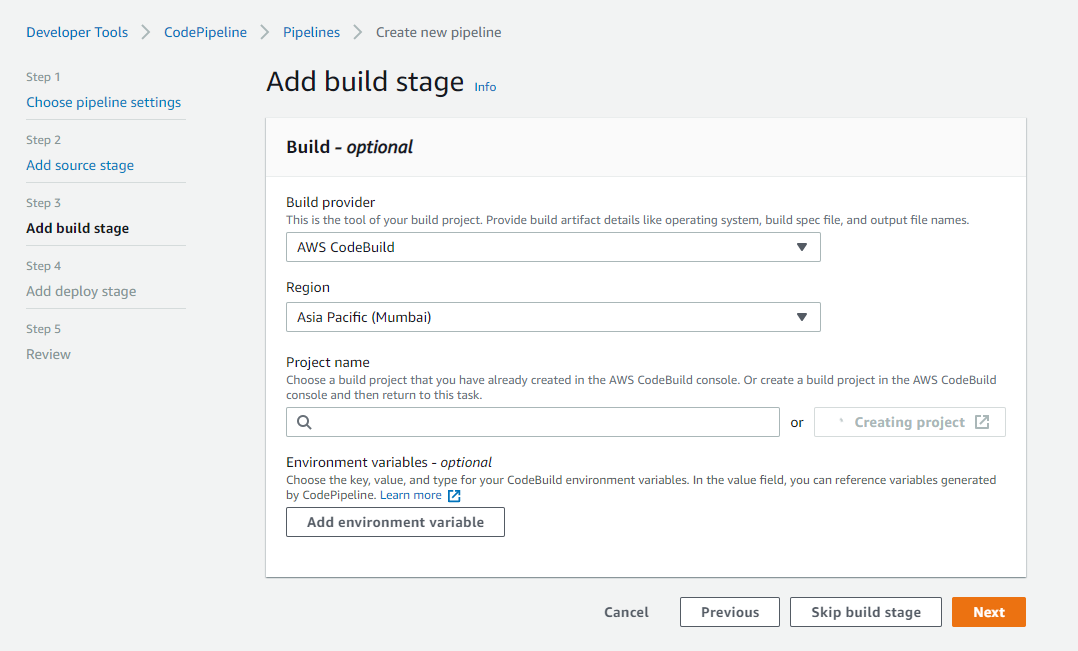
In the build stage, select Region and create a new build project in CodeBuild as shown below.
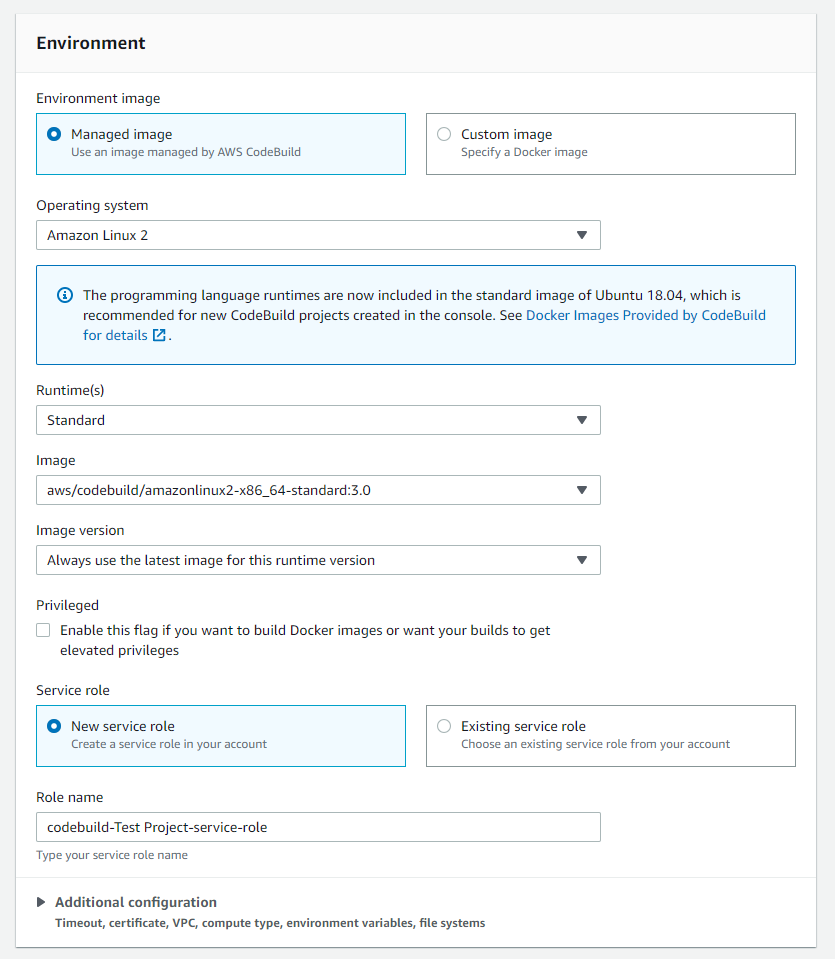
In the Build project, We have to configure the build environment. For this example we will use Amazon Linux 2 as it comes with most build tools pre-installed. Select the rest of the options as shown in the picture and for the Service role, we will create a new service role (You can select the existing one if you have created it before).
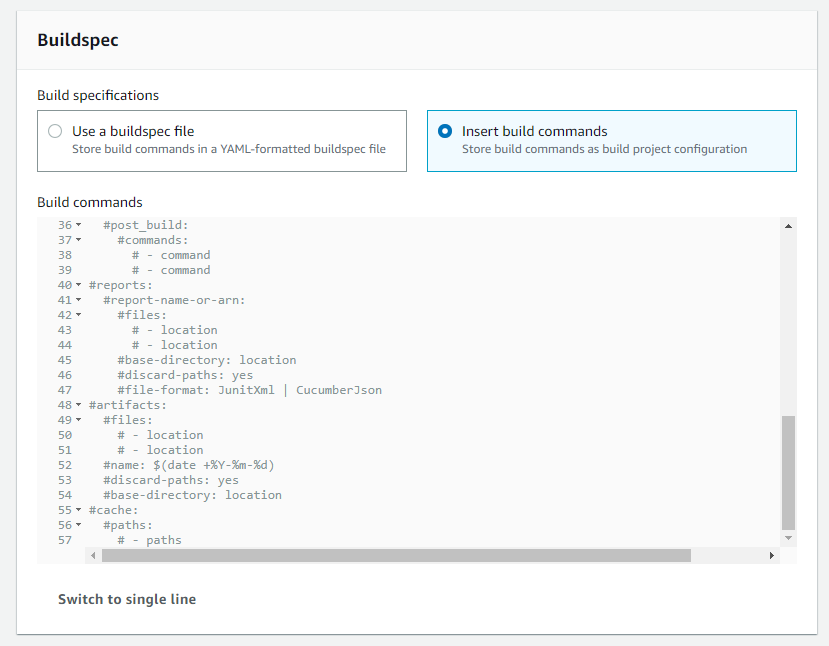
AWS CodeBuild uses build commands for build your application, You can provide build commands directly or you can include command file (YAML-Formatted buildspec) in your project source code. Once build command configuration is done, we can create our build project.
To know more about AWS CodeBuild build commands, read the official docs here.
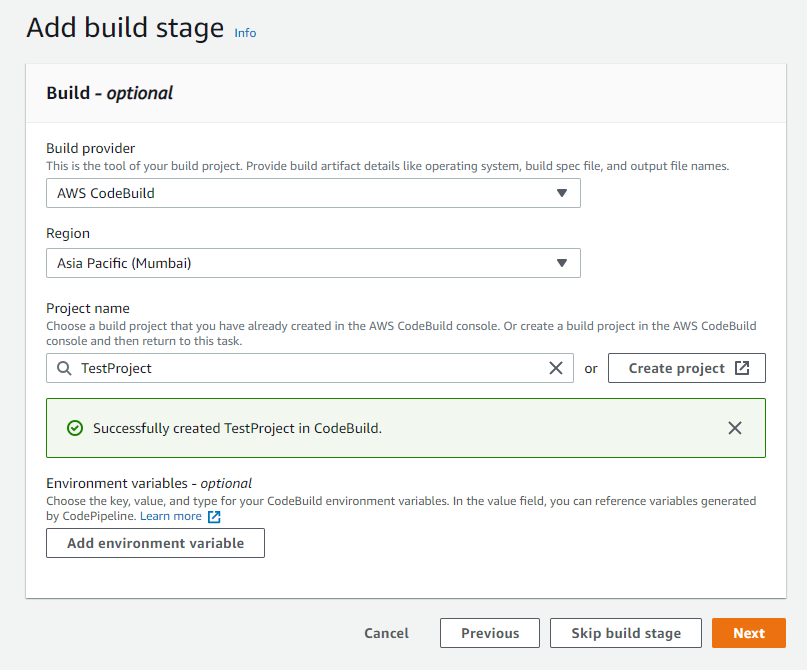
Once our build project is created, we can move to the next step which is Deployment.
Deployment Stage (CodeDeploy)
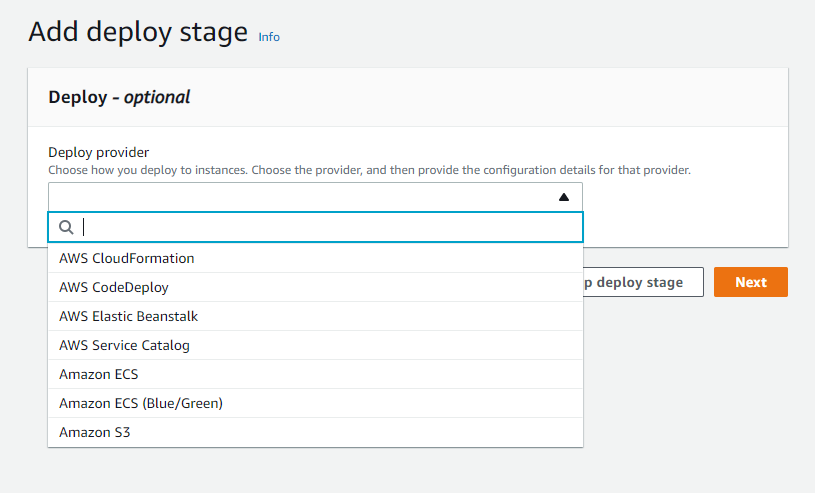
AWS CodePipeline provides many options for deployment, For our example we will use “AWS CodeDeploy”.
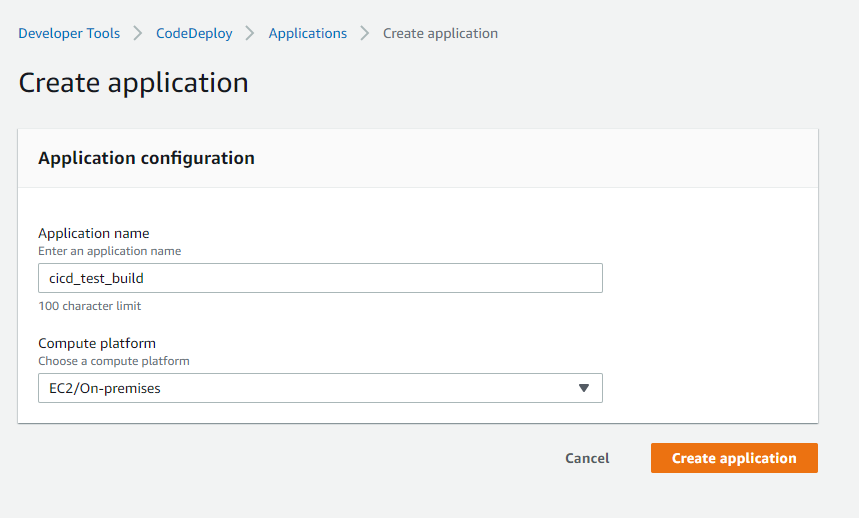
Provide the application name and select the compute platform where our application will be deployed, For this example we will select “EC2/On-Premises”.

For deployment, we need to create a deployment group.
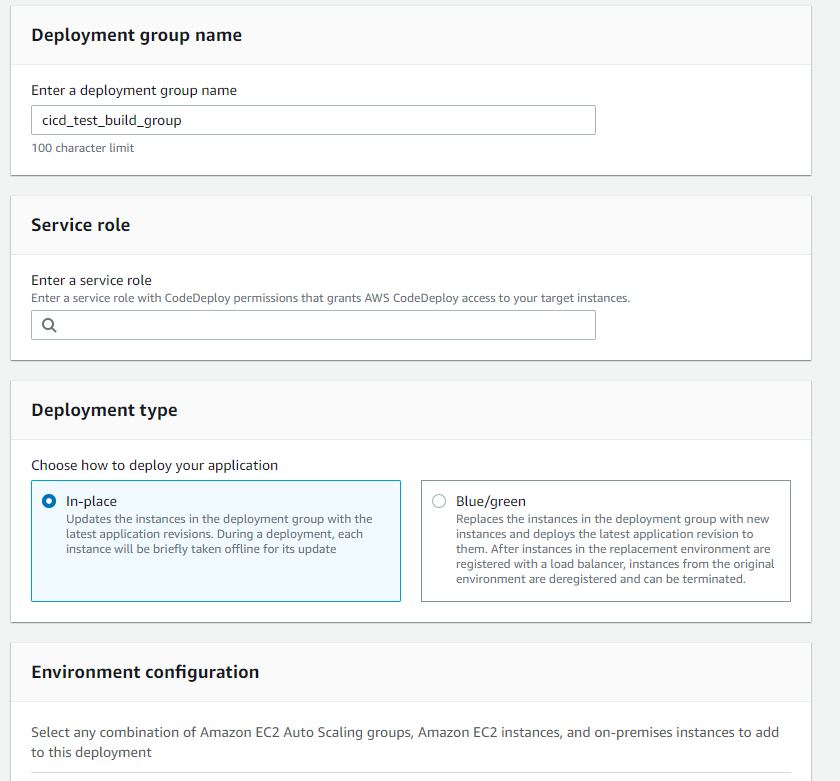
To create a deployment group, we need to provide the deployment group name and service role, you can create a new role or select the one if already created.
If you are not familiar with how to create a “service role” you can visit this official post from AWS.
Then select the deployment type as per required, We will use In-place deployment for this example.
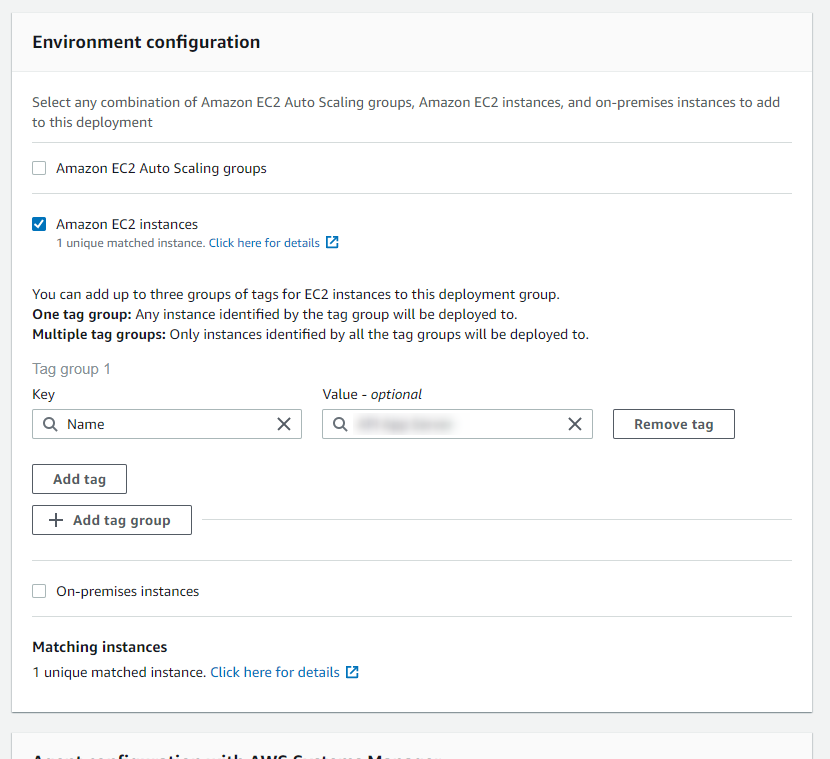
Next, in environment configuration, We will select the deployment environment parameters, for example we are using EC2 Instances, if you have an auto scaling group or on-premises instances then you can use that as well.
You have to provide your EC2 tag for AWS to identify which EC2 Instances to use for this deployment. Here I have already provided the name to my EC2 Instance and so I can use that tag here.
If AWS finds matching instances based on the provided tag then it will show under the matching instances section, you should confirm if the selection of instances is correct.
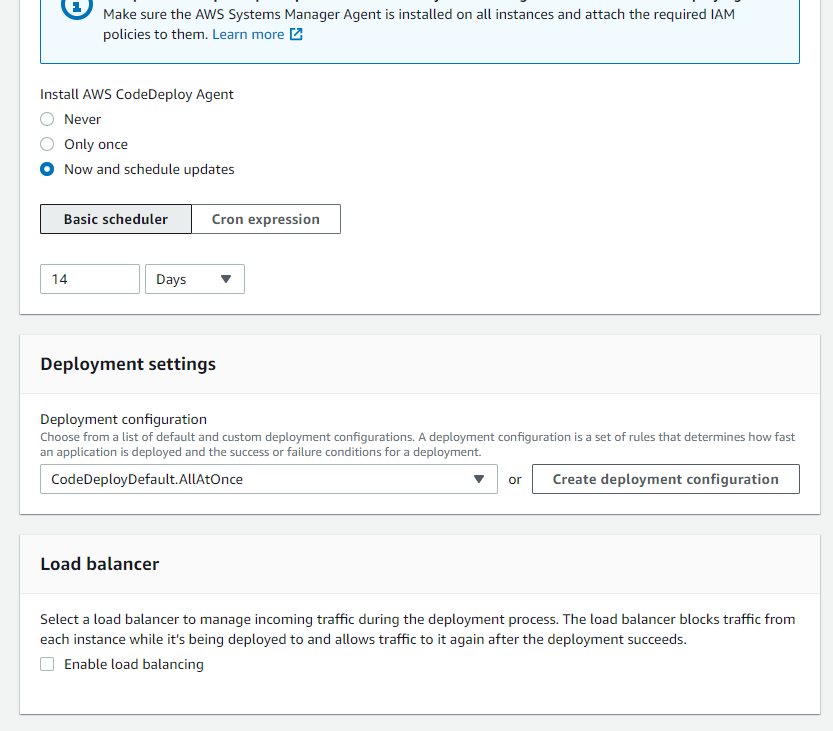
Next, We have to install AWS CodeDeploy Agent in our EC2 Instances. If it’s Amazon Linux, then it comes pre installed and you don’t need to. If you don’t have it pre installed and don’t know how to then you can read the official documentation here.
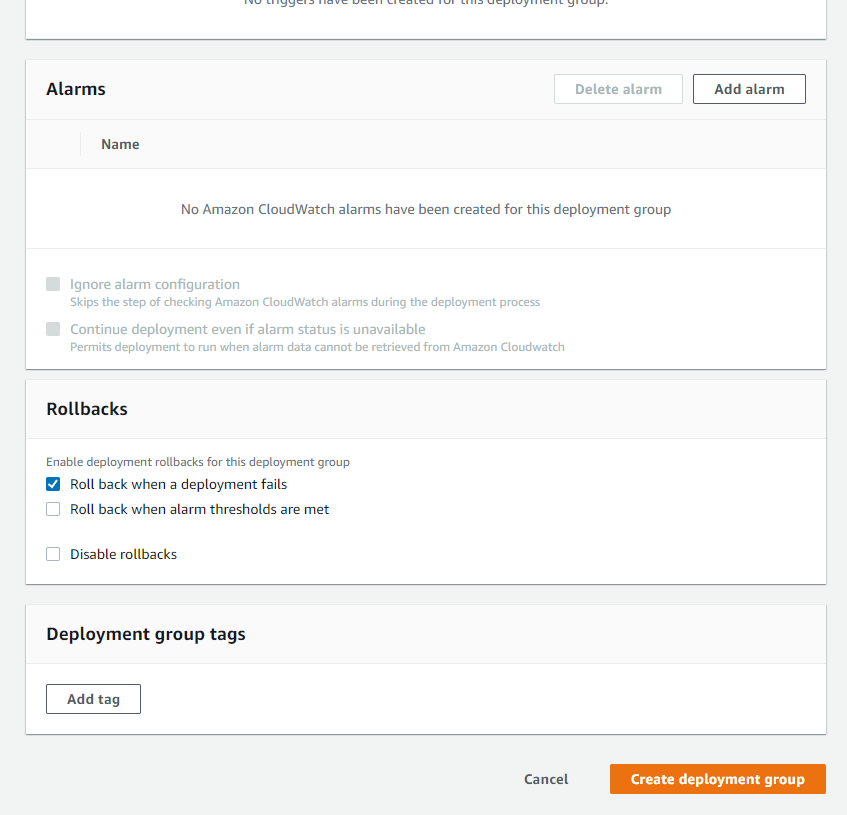
Now, If you require any type of alert from AWS during the deployment process then you can create an alarm and next we have to select the rollback action for if something goes wrong during deployment. Then create a tag if you need to and click on create deployment group.
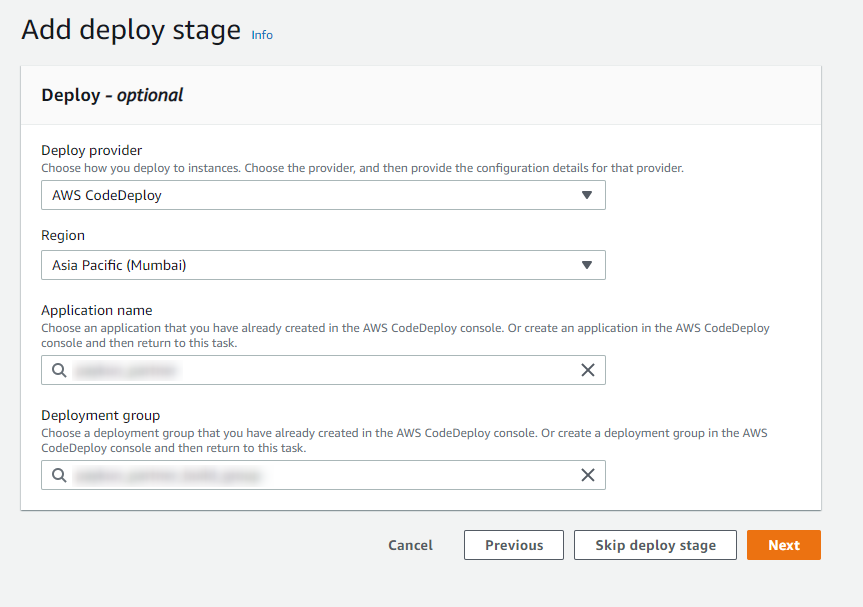
Once, Deployment group is created, we select the newly created deployment group and click on next.
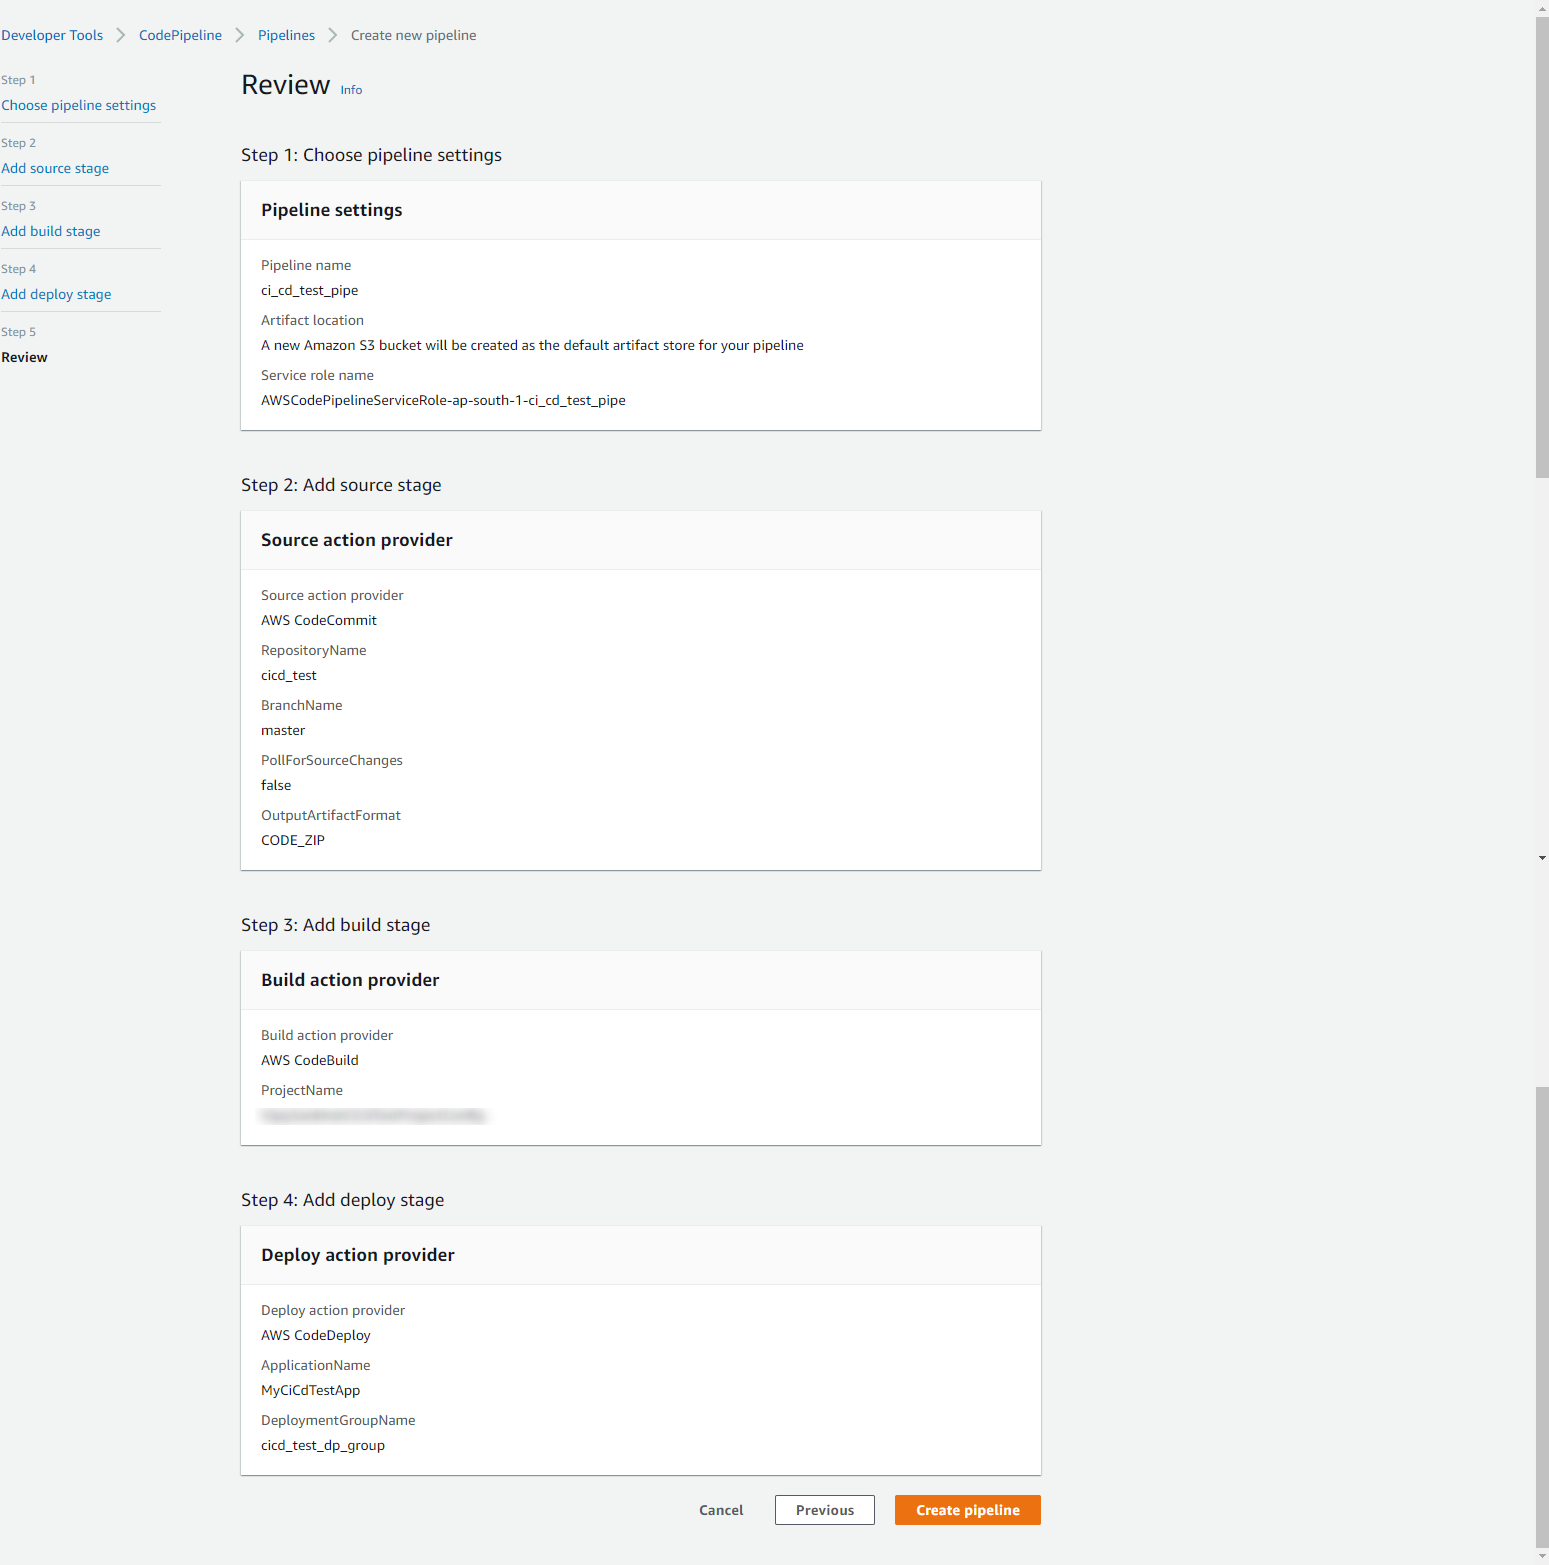
You will see this review screen where you can review all the details and at last click on Create Pipeline. This will create your CI/CD pipeline and you can see it in the pipeline list.
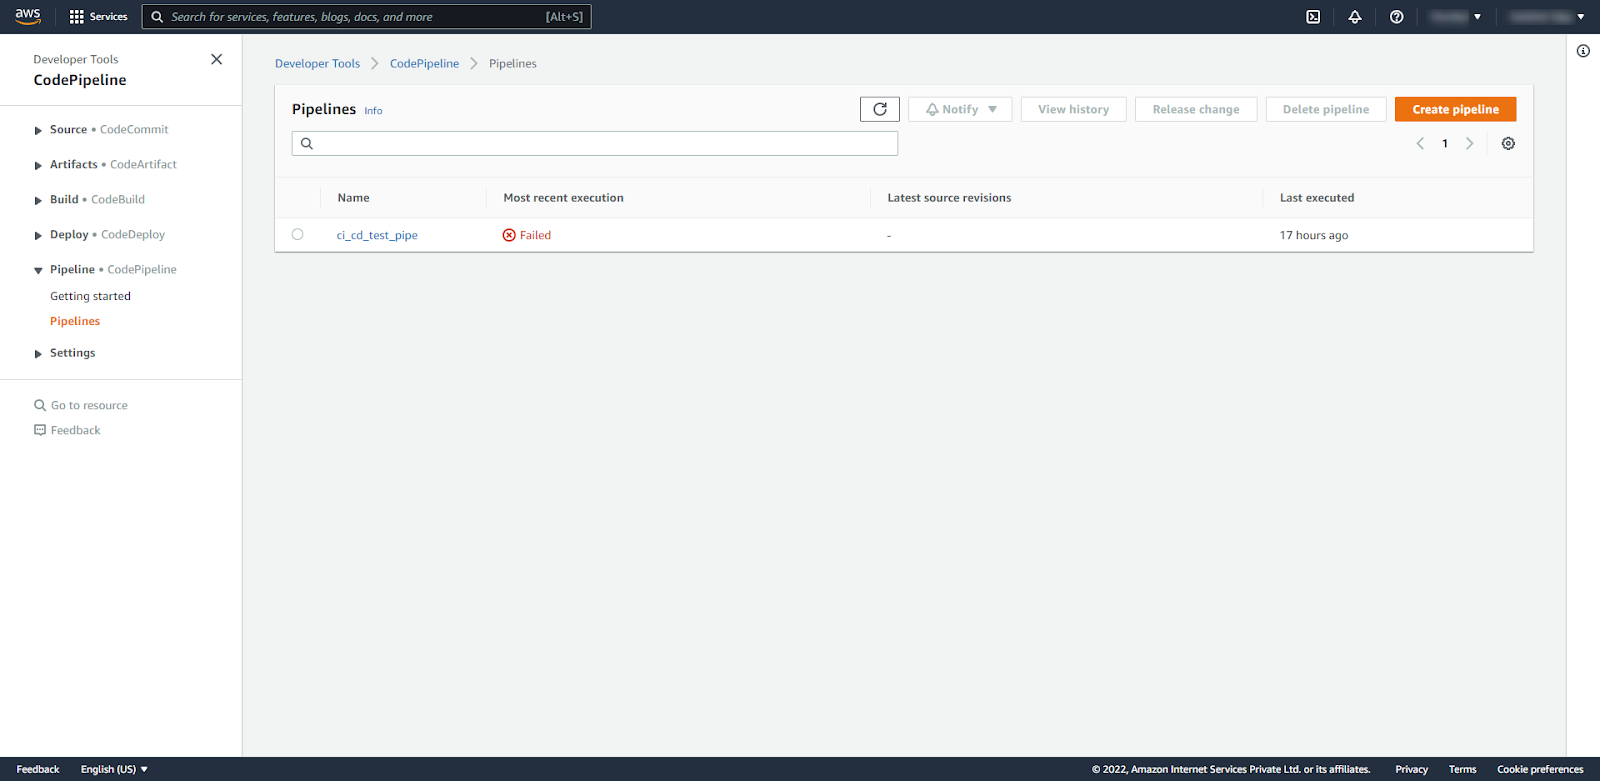
And as per our pipeline configuration, it will get executed and will look something like this:
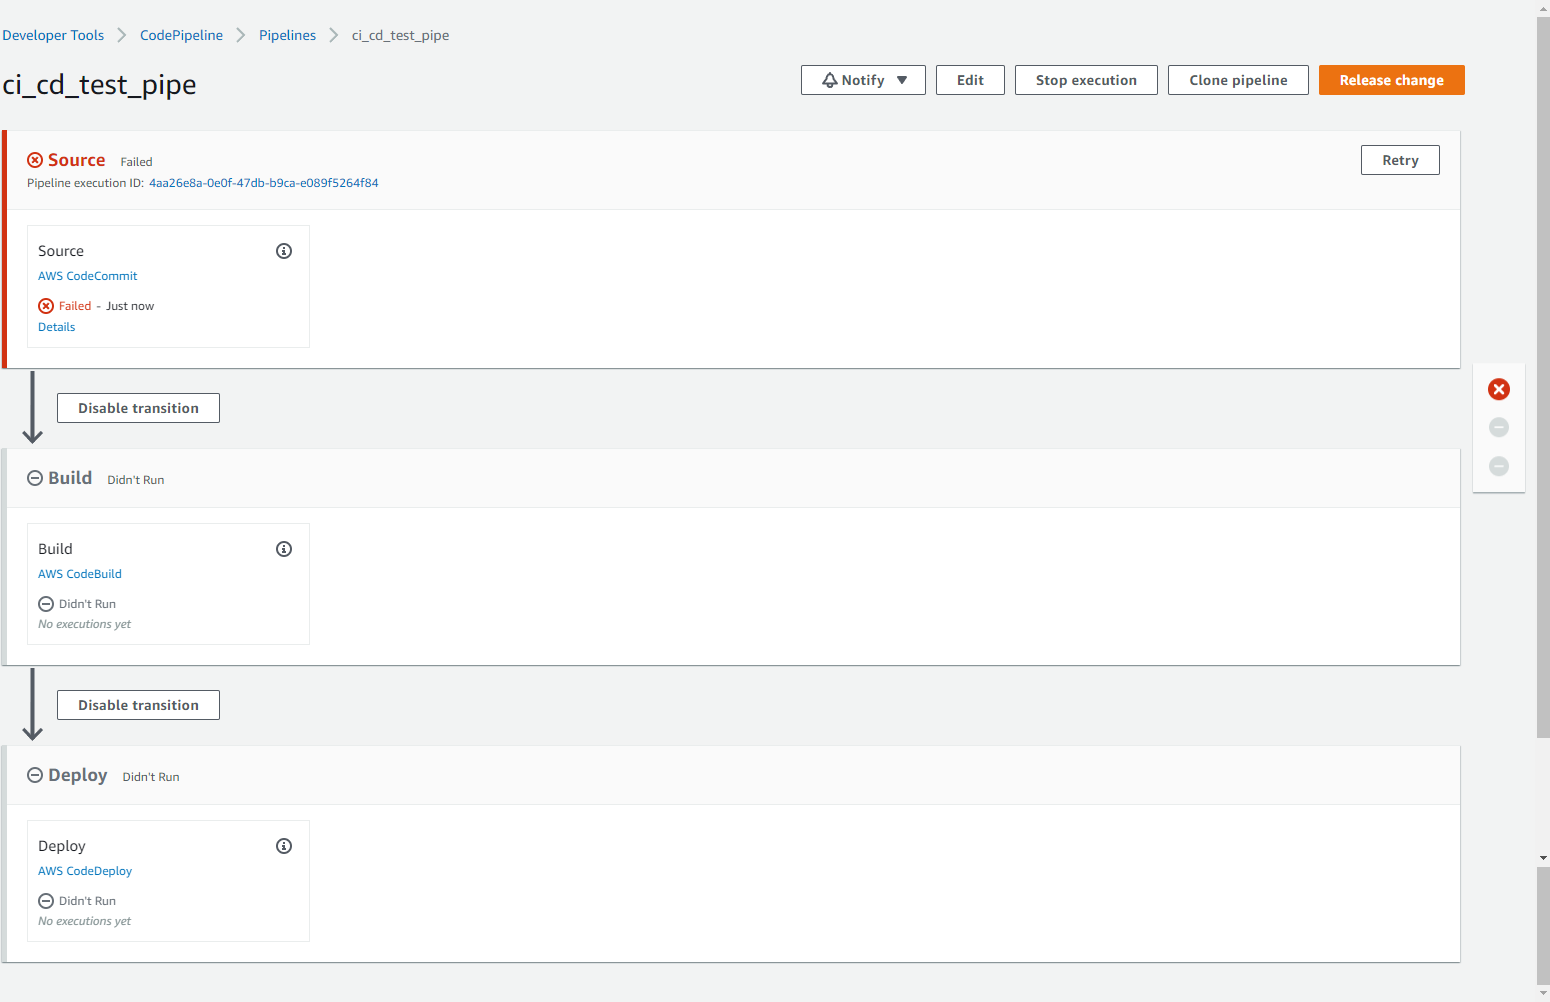
Our pipeline is now ready, during its execution, you will see if any stage is failed or successful or is it in process, if it’s failed due to some reason then you can also see it’s details from there and resolve it. This topic is very big to discuss all in a single post, but we have seen the most important information in this post and I hope that it helps you in setting up your own CI/CD pipeline in AWS.
$ share --platform
$ cat /comments/ (0)
$ cat /comments/
// No comments found. Be the first!
